GoPay module - How to install and setup
Installation instructions
Option 1 (recommended) - installing using Composer
– You will obtain a repository token from Coduo (after purchasing your extension)
– Add your token to Composer config to get access to module’s source code
‘composer config –global –auth github-oauth.github.com [token]’
– Install the package by running
`composer require zingybits/module-payment-gopay-core zingybits/module-payment-gopay-front-ui zingybits/module-payment-gopay-core`
– enable new modules by running
`php bin/magento module:enable ZingyBits_GoPayCore ZingyBits_GoPayFrontUi ZingyBits_GoPayAdminUi`
Option 2 – using a zipped file
– Obtain your zipped package from Coduo
– Unzip the package file into the `app/code` folder in your application root
– enable new modules by running
`php bin/magento module:enable ZingyBits_GoPayCore ZingyBits_GoPayFrontUi ZingyBits_GoPayAdminUi`
Admin Panel Configuration and Settings
You can find all settings by navigating to:
Stores -> Configuration (Settings) -> SALES -> Payment Methods -> Other Payment Methods -> Gopay gateway
step 1/ enable GoPay module

Once you enable this module, other options will appear
step 2/ connect to GoPay account
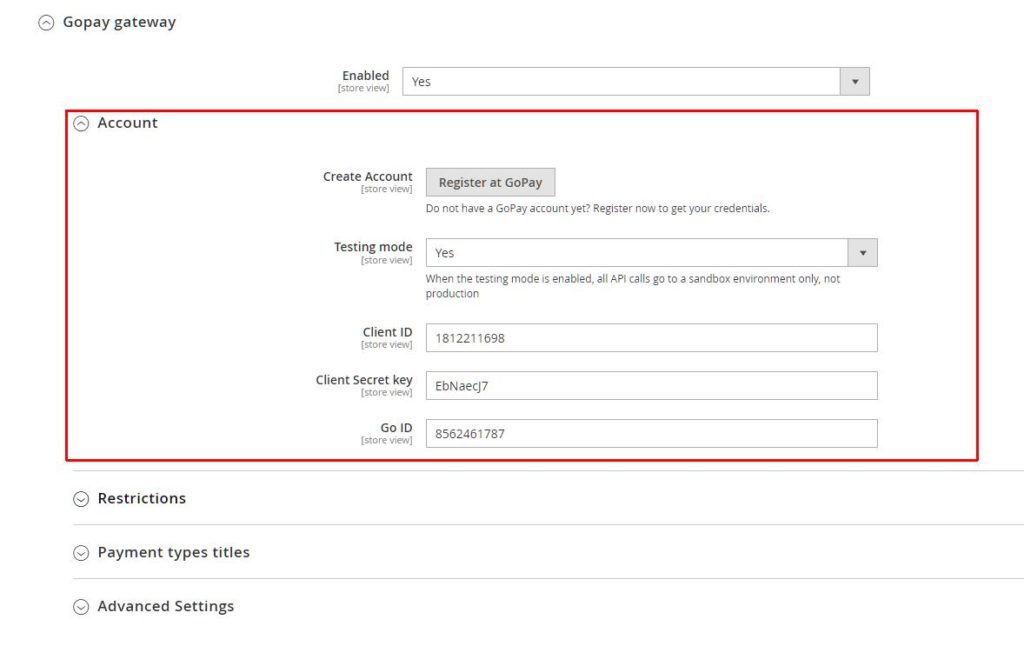
2a/ register with GoPay
First, you will need to register your GoPay account. If you have not done so yet, you can use the ‘Create Account’ button, that will redirect you straight to the registration form at GoPay.
2b/ get your API keys
Once you register your new account with the GoPay, you will obtain your API credentials to connect the Adobe Commerce module with GoPay – Client ID, Client Secret and Go ID.
2c/ choose your mode
If you only need to test the GoPay functionality, you can turn on the ‘Testing mode’ that will use the GoPay sandbox environment. For production mode, use NO for this setting.
step 3/ set up your restrictions
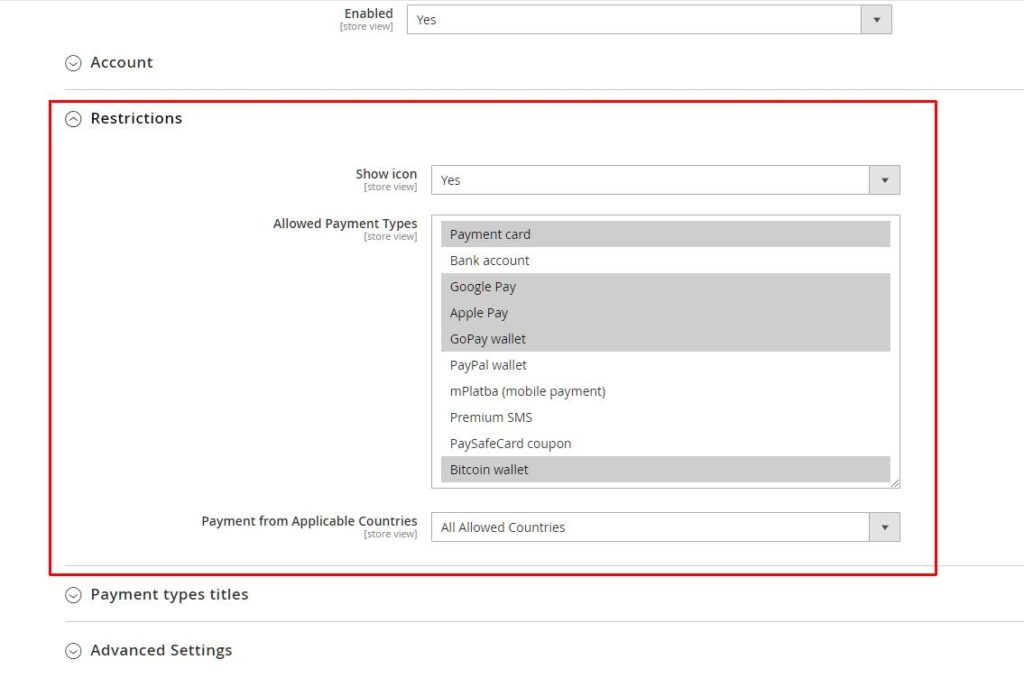
3a/ Show icon option
Decide if you wish to show pre-defined icons with each payment instrument.
3b/ Allowed Payment Types
Choose which GoPay payment instruments will be offered on the checkout page as the payment option. Each instrument will be displayed as a standalone payment option.
3c/ Payment from Applicable Countries
Choose the countries for which the GoPay payment option is applicable.
step 4/ Set up payment titles
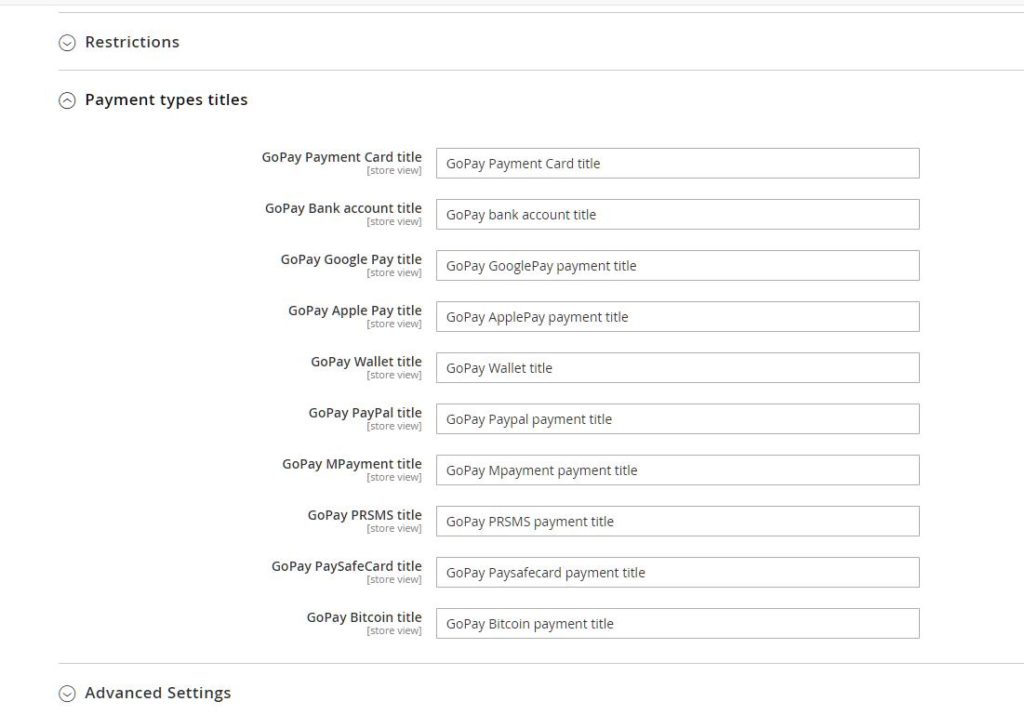
For each payment instrument, you can choose your own label to be shown in the checkout.
step 5/ Advanced settings
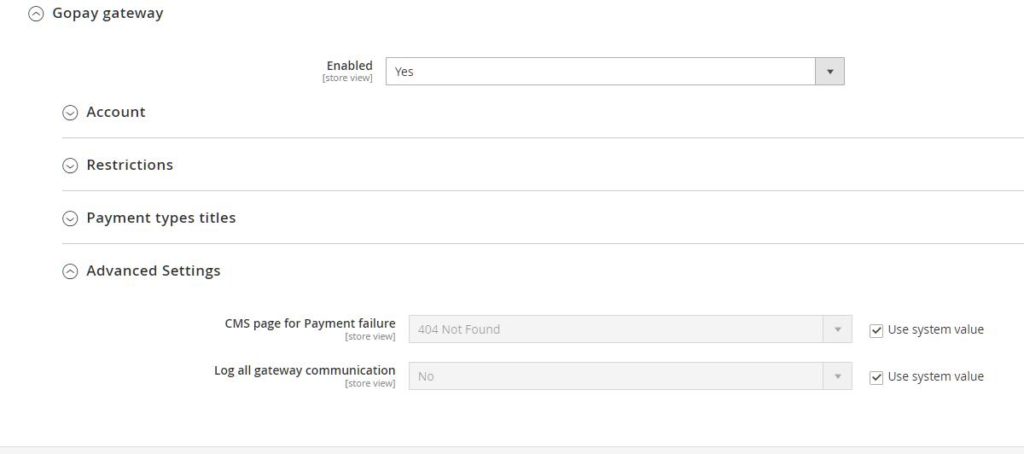
5a/ CMS page for Payment failure
Choose a page to be redirected to, when the payment fails on the gateway for whatever reason. You can create a new Magento landing page with your own wording and content – via Content -> Pages – and then choose this new page as the options in the dropdown.
5b/ Log all gateway communication
This would log all communication between your Adobe commerce webstore and the GoPay gateway into a single file. It is recommended to leave this feature off and only turn it on for debugging reasons.