Gmail Oauth module - How to install and setup
Install instruction
Installation
in production please use the `–keep-generated` option
Type 1: Zip file
– Unzip the zip file in `app/code/ZingyBits`
– Enable the module by running `php bin/magento module:enable ZingyBits_GmailOauth`
– Apply database updates by running `php bin/magento setup:upgrade`
– Flush the cache by running `php bin/magento cache:flush`
Type 2: Composer
– Get a token from a vendor
– Install the token with this command to get access to the module
composer config –global –auth github-oauth.github.com [token]
– Install the module composer by running `composer require zingybits/module-gmail-oauth`
– enable the module by running `php bin/magento module:enable ZingyBits_GmailOauth`
– apply database updates by running `php bin/magento setup:upgrade`
– Flush the cache by running `php bin/magento cache:flush`
Module settings
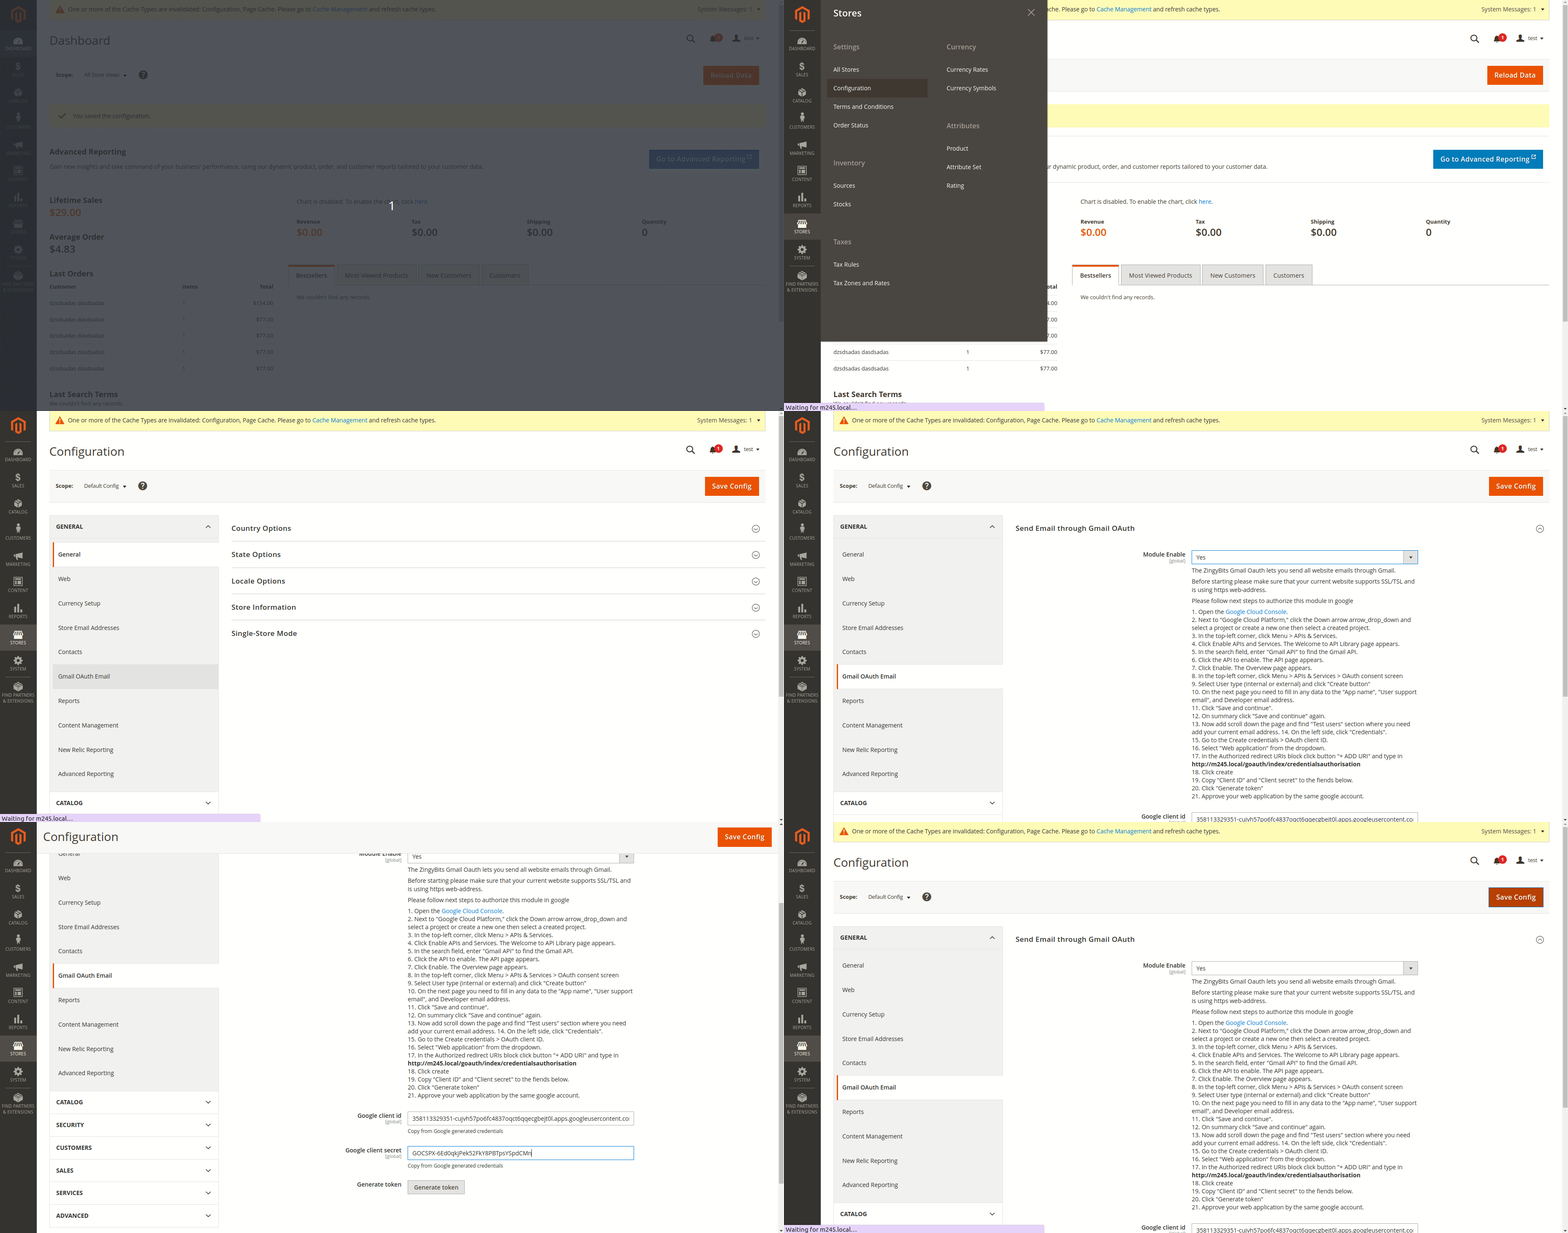
The module settings are located at Stores → Configuration → General → Gmail Oauth Email

How to get "Google client id" and "Google client secret"
The ZingyBits Gmail Oauth lets you send all website emails through Gmail.
Before starting please make sure that your current website supports SSL/TSL and is using https web-address.
Please follow next steps to authorize this module in google
1. Open the Google Cloud Console.
2. Next to “Google Cloud Platform,” click the Down arrow arrow_drop_down and select a project or create a new one then select a created project.
3. In the top-left corner, click Menu > APIs & Services.
4. Click Enable APIs and Services. The Welcome to API Library page appears.
5. In the search field, enter “Gmail API” to find the Gmail API.
6. Click the API to enable. The API page appears.
7. Click Enable. The Overview page appears.
8. In the top-left corner, click Menu > APIs & Services > OAuth consent screen
9. Select User type (internal or external) and click “Create button”
10. On the next page you need to fill in any data to the “App name”, “User support email”, and Developer email address.
11. Click “Save and continue”.
12. On summary click “Save and continue” again.
13. Now add scroll down the page and find “Test users” section where you need add your current email address.
14. On the left side, click “Credentials”.
15. Go to the Create credentials > OAuth client ID.
16. Select “Web application” from the dropdown.
17. In the Authorized redirect URIs block click button “+ ADD URI” and type in /goauth/index/credentialsauthorisation
18. Click create
19. Copy “Client ID” and “Client secret” to the fiends below.
20. Click “Generate token”
21. Approve your web application by the same google account
