CSOB module - How to install and setup
Installation instructions
Option 1 (recommended) - installing using Composer– You will obtain a repository token from Coduo (after purchasing your extension)
– Add your token to Composer config to get access to module’s source code
‘composer config –global –auth github-oauth.github.com [token]’
– Install the package by running
`composer require zingybits/module-payment-csob`
– enable new modules by running
`php bin/magento module:enable ZingyBits_PaymentCsob`
Option 2 – using a zipped file
– Obtain your zipped package from Coduo
– Unzip the package file into the `app/code` folder in your application root
– enable new modules by running
`php bin/magento module:enable ZingyBits_PaymentCsob`
Admin Panel Configuration and Settings
You can find all settings by navigating to:
Stores -> Configuration (Settings) -> SALES -> Payment Methods -> Other Payment Methods -> Csob gateway
step 1/ enable Csob module

Once you enable this module, other options will appear
Choose the Title – this will show up during the checkout as the payment option label.
step 2/ connect your CSOB account
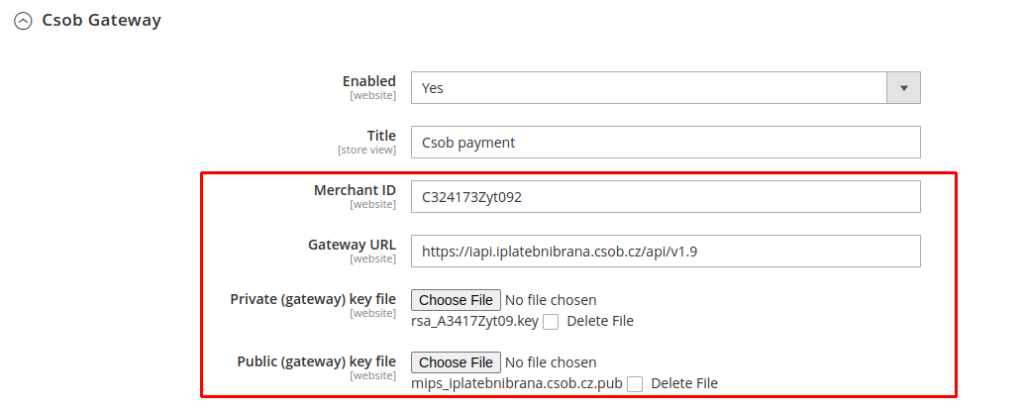
2a/ register with CSOB
First, you need to register with CSOB bank. They will provide you with an account from which you can obtain your
– merchant ID
– gateway url
– public and private keys
Enter these and upload your keys
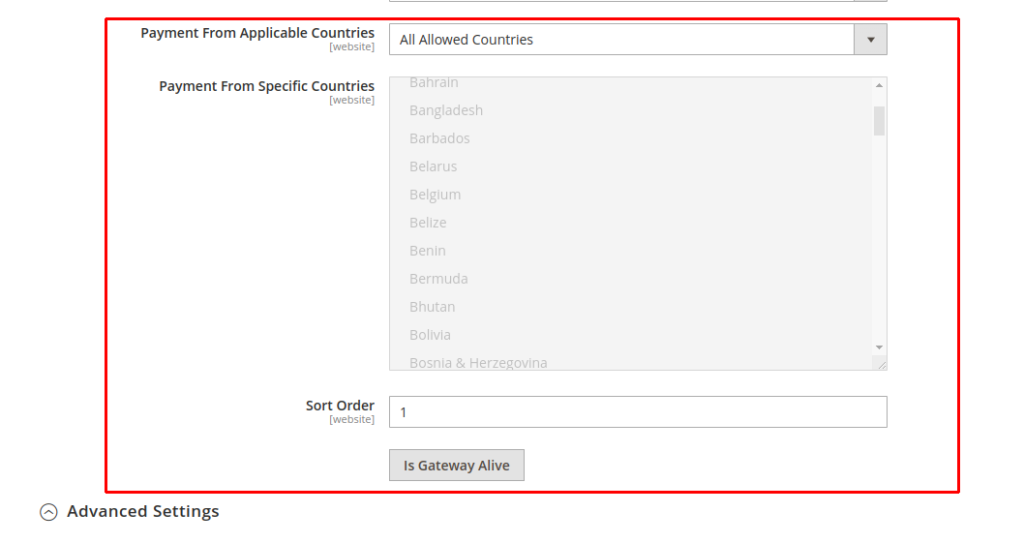
2b/ Check the gateway
Once you save these and clear the config cache, you can click the Is Gateway Alive button to check that all your credentials are valid and working,
This would use the credentials to call the given url and in a new pop-up window will return the gateway response (in a JSON format)
Something similar to this:
{"dttm":"20230323183030","resultCode":0,"resultMessage":"OK"}2b/ Sandbox vs Production
For you development site you can use different credentials (gateway url and keys). Once everything is tested and working, you can use the live credentials for the real transactions.
step 3/ regular settings
3a/ CMS page for payment failure

You can create your own custom payment failure landing page (regular Magento CMS page).
If for whatever reason the payment is not successful on the gateway, the customer will be redirected to this page (default is the “404 Non Found” page)
3b/ Authorization vs Capture

You can decide which payment flow you want to apply with your CSOB gateway.
– “Authorize Only” – this option would only block (authorize) the order amount in the customer’s account. The amount is blocked by the bank and customer cannot handle it in any way. Once the order invoice is created in Magento, the amount will be captured – transferred to the merchant’s bank account.
You can also use partial capture – in this case several invoices may be issued, provided their overall summed amount is less or equal the authorized amount. If e.g. a customer would order 4 different pieces of goods and one of them becomes out of stock, you may issue a partial invoice for the 3 pieces and capture the corresponding amount. The rest of the authorized totals will be waiting until the second invoice is issued and then only captured.
– “Authorize and Capture” – this would capture the whole order amount straight away to merchant’s account. Also, the invoice will be auto-created in Magento for the order.
3c/ Payment option restrictions
Choose the countries for which the CSOB payment option is applicable during checkout.
step 4/ Advanced settings
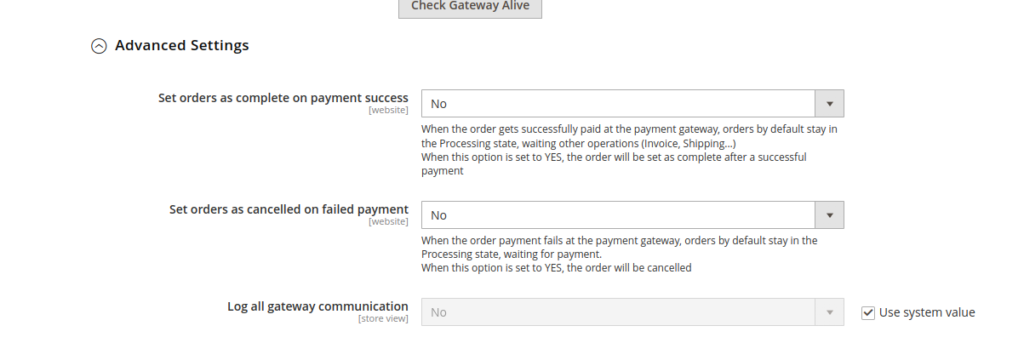
4a/ Order status
payment success – “Set orders as complete on payment success” :
– Yes: the order will be set as complete after a successful payment
– No: the order will be set as processing after a successful payment
payment failed – “Set orders as cancelled on failed payment” :
– Yes: the order will be set as cancelled after a failed payment
– No: the order will be set as processing after a failed payment
4b/ All communication logging
This option would log all communication between your Adobe commerce webstore and the CSOB gateway into a single file. It is recommended to leave this feature off and only turn it on for debugging reasons.