Citizen payment module for Magento 2
How to install and setup
Installation instructions
Option 1 (preferable): using Composer
– make sure you have the Magento 2 application installed
– install the package (in your Magento root folder):
composer require zingybits/module-payment-citizen-core
composer require zingybits/module-payment-citizen-front-ui - enable both modules php bin/magento module:enable ZingyBits_CitizenCore ZingyBits_CitizenFrontUi– apply changes:
bin/magento setup:upgrade
bin/magento setup:di:compile
Option 2: app/code
– Create new folder: `app/code/ZingyBits/CitizenCore`
– Clone the git repository into this new folder
git clone https://github.com/zingybits/module-payment-citizen-core.git
– Create new folder: `app/code/ZingyBits/CitizenFrontUi`
– Clone the git repository into this new folder
git clone https://github.com/zingybits/module-payment-citizen-front-ui.git
– enable both modules
php bin/magento module:enable ZingyBits_CitizenCore ZingyBits_CitizenFrontUi
– apply changes:
bin/magento setup:upgrade
bin/magento setup:di:compile
Module admin settings
You can find all settings by navigating to:
Stores -> Configuration (Settings) -> SALES -> Payment Methods -> Other Payment Methods
General settings
Enable Citizen payment for the checkout
By default, this payment option will be disabled and you need to Enable it by setting Enabled to YES
Also, you will need to have an account with Citizen in order to use this extension. If you do not have one yet, just click the Register button and you will be redirected to the Citizen website – register new account page.
If you already have a Citizen account, just skip the Register button and only fill in the Merchant email address, that you use for the Citizen account.
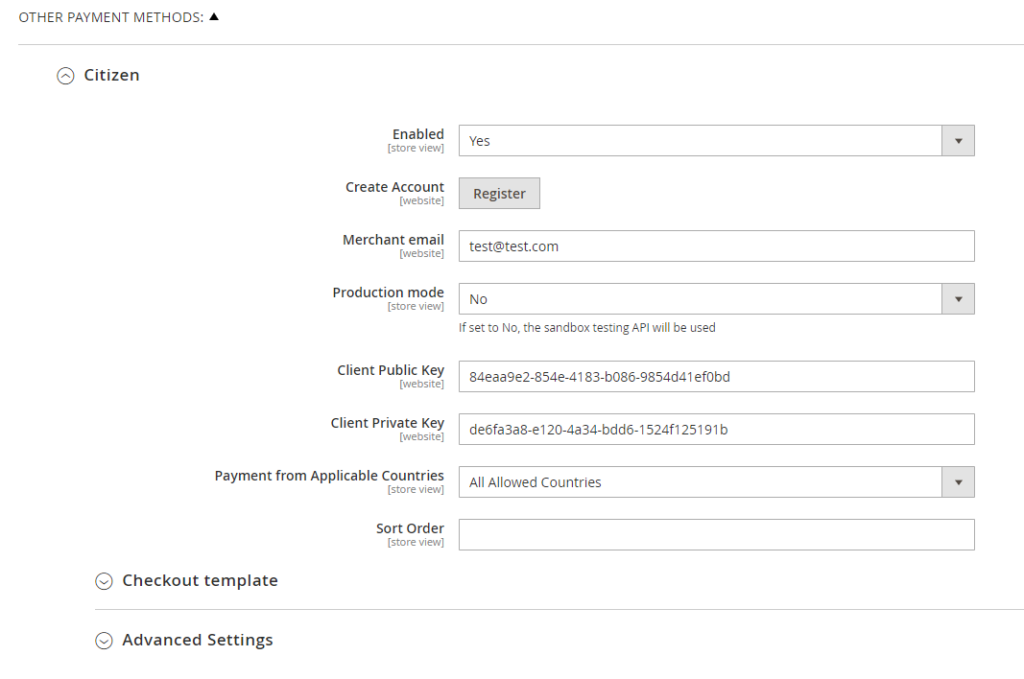
Production vs Sandbox mode
By default, all API calls and transactions run in a test mode against a sandbox Citizen account
Once everything is properly tested and you are ready to go live, you will switch into the Production mode (and change your API keys).
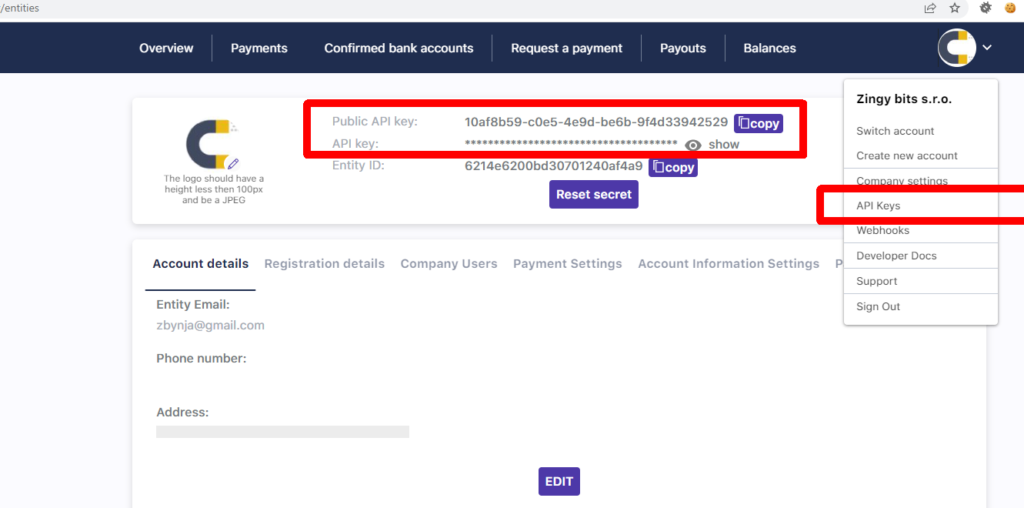
API keys
Once you register with Citizen, you can get your API keys from the Citizen account dashboard.
After you log-in, navigate to your settings (in the top-right corner, your Company icon) and select API Keys – Then you need to copy both public (Public API key) and private (API key) keys and save in the Magento admin settings.
Please note, you will have different API keys for you sandbox and production accounts.
Payment from Applicable Countries
You can restrict your customers to only be able to pay from certain countries
- All Allowed Countries option – no restriction on the country from which your customers pay
- Specific Countries option – you can choose which countries this payment will apply to

Sort Order
In case you offer more than one payment methods in checkout, here you can control the order in which the payment methods are listed
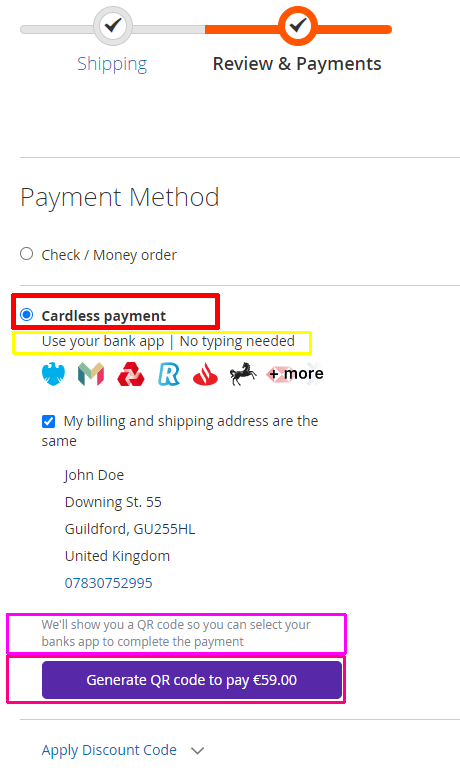
Checkout template settings
These settings will let you control the text entries on the checkout frontend template
Here is how they correspond to each other:
Admin settings:

And how it applies on the frontend:
Advanced settings
These are usually meant to stay in their default state.
Send email after payment complete
When set to YES, the New Order email is sent from Magento to customers only once the payment transaction is complete.
Cancel order on cancelled payments
When the users cancel their transaction on the Citizen gateway, the Magento order will be cancelled as well.
If this option is set to NO, then the order will only change its status to ‘citizen_payment_cancelled’ but will remain in the Processing state until cancelled manually.
Log all gateway communication
This option is mainly for the trouble-shooting and will write all API communication between Magento and Citizen into a log file. Intended mainly for developers or system admins.