Balikobot - How to install and setup
Install instruction
Installation
in production please use the `–keep-generated` option
Option 1: Composer (preferred installation method)
– Get a token from a vendor
– Install the token with this command to get access to the module
`composer config –auth github-oauth.github.com [token]`
– Add custom repositories for composer
`composer config repositories.zingybits/module-balikobot-core vcs https://github.com/zingybits/module-balikobot-core.git`
`composer config repositories.zingybits/module-balikobot-admin-ui vcs https://github.com/zingybits/module-balikobot-admin-ui.git`
`composer config repositories.zingybits/coduo-core-m2-module vcs https://github.com/zingybits/coduo-core-m2-module.git`
– Install the module composer by running `composer require zingybits/balikobot`
– enable the module by running `php bin/magento module:enable ZingyBits_BalikobotCore`
– enable the module by running `php bin/magento module:enable ZingyBits_BalikobotAdminUi`
– apply database updates by running `php bin/magento setup:upgrade`\*
– Flush the cache by running `php bin/magento cache:flush`
Option 2: Zip file
– Unzip the zip file in `app/code/ZingyBits`
– Enable the module by running `php bin/magento module:enable ZingyBits_BalikobotCore`
– Enable the module by running `php bin/magento module:enable ZingyBits_BalikobotAdminUi`
– Apply database updates by running `php bin/magento setup:upgrade`\*
– Flush the cache by running `php bin/magento cache:flush`
Module settings
The module settings are located at Stores → Configuration → Sales → Balikobot
1/ Get your credentials
First, you need to have your account with Balikobot, then from there you will obtain your integration credentials (API user/key) to connect your Magento store with Balikobot.
Once you save your API configuration you will be able to set up the other options, such as matching your Magento shipping options with Balikobot codes.

2/ Tracking Email
When a new order is ready for your carrier to pick it up, you can decide to send you customer an email including a link for tracking the order (given by your carrier)

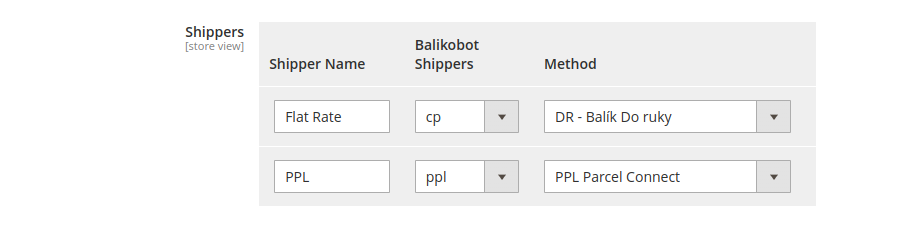
3/ Set "Allowed Shippers"
After entering the Balikobot credentials in the “General Configuration” section, there another section “Allowed Shippers” will be available. There it would be required to map currently enabled shipping methods to any knowing shipping method from Balikobot.
This feature gives a big flexibility, for example when you have two same shipping modules but with different prices, you still can refer to one single Balikobot shipping method.
Print labels
The module will give new features, such as creating labels, containing all the information about the parcel in one click!
On the label, you will be able to have
- Return address
- Delivery address
- Contact information
- Package information (weight, etc.)
- Barcode (Tracking shipping number)
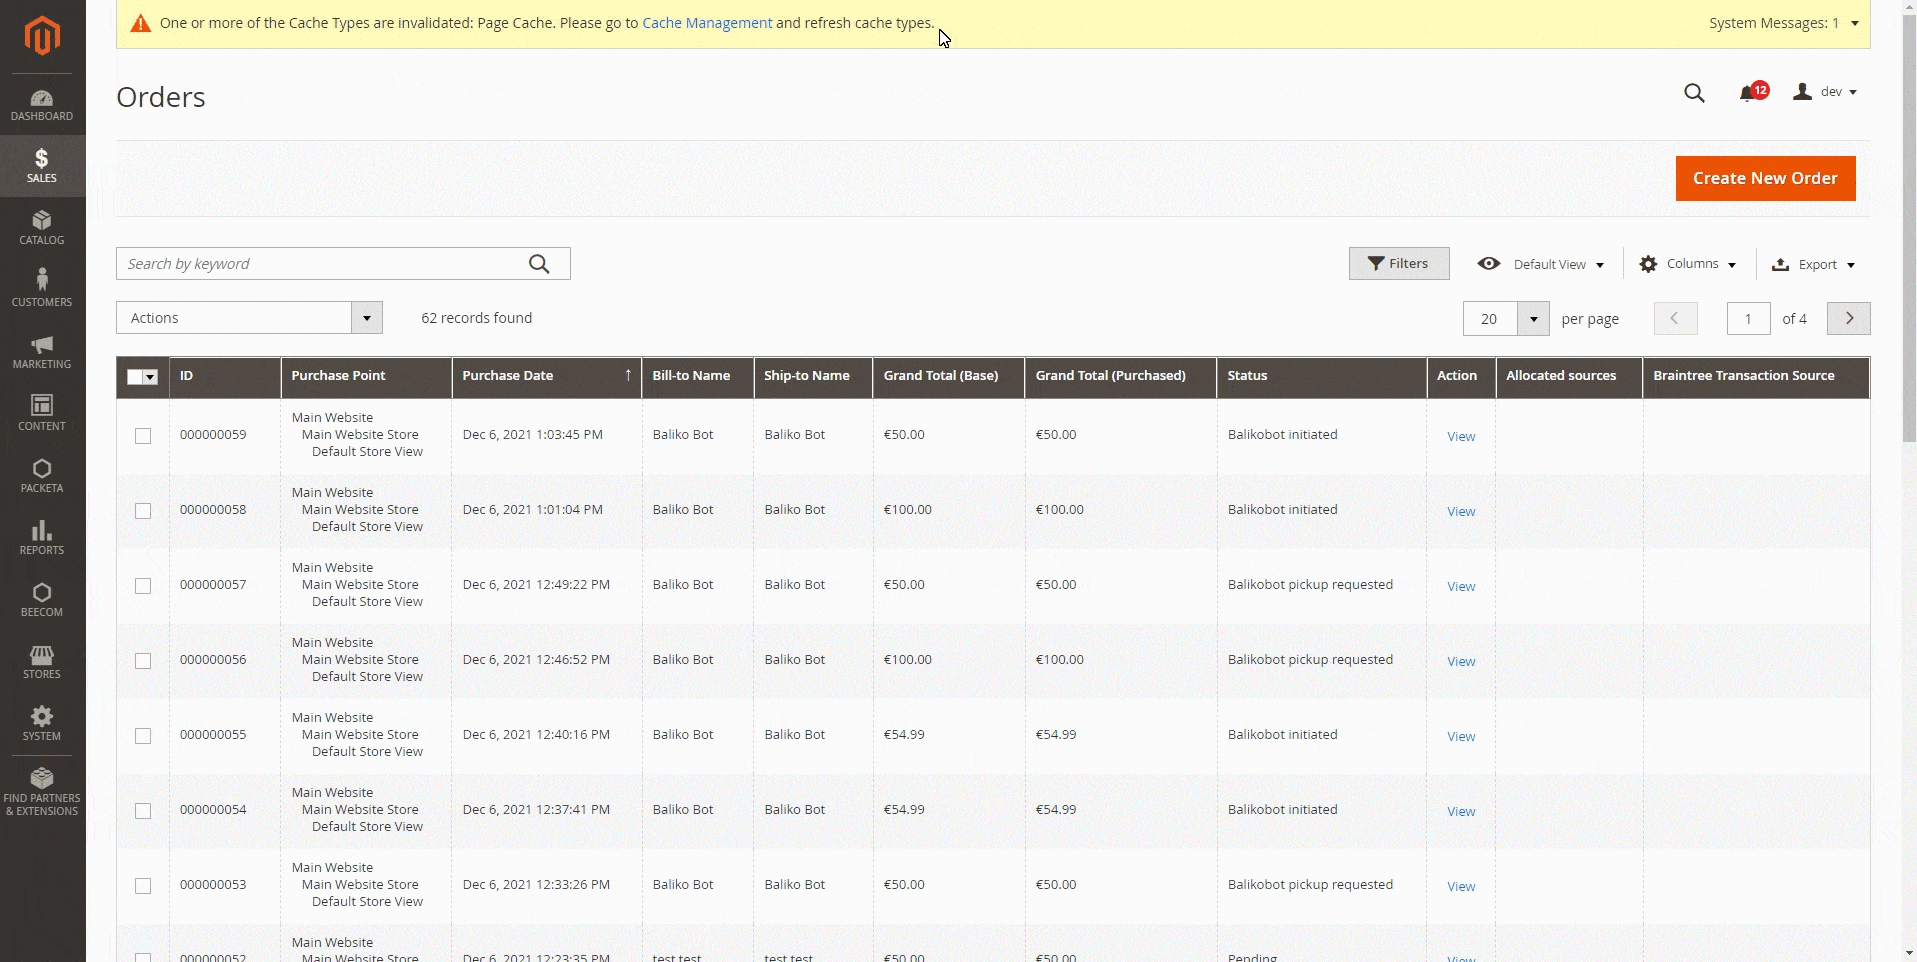
Pickup request
e.g. the ability to combine and send applications directly to the shipping vendor. When all parcels are ready to be sent to a specific shipping vendor, you just need to select the orders from Magento administrator order list and click on Pickup request - and that's it. After all, you will get a PDF of the Order list to be given for the courier to sign.